As you know, you won’t go far without brakes either in life or in a car, because, in addition to acceleration, you also need to stop in time, prevent a collision with an obstacle, etc.
Let's consider how the VAZ 2110 brake system works, what malfunctions are the most common, and what improvements are possible in order to improve the brakes.
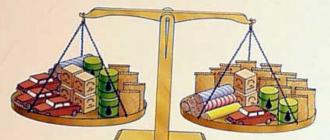
Scheme of the hydraulic drive of the brakes
Device
The machine has hydraulic brakes installed and mostly reliable. They are two-circuit, have a diagonal distribution. That is, if one part suddenly failed, then braking by another circuit is possible. For the sake of safety, the VAZ 2110 brakes work diagonally, one circuit is the right front and left rear wheels, the other also diagonally.
Such a device allows you to brake qualitatively (without skidding and other troubles) even in the event of a malfunction, if the brakes in one of the circuits have disappeared.
Consider the device brake system. The hydraulic drive includes a vacuum booster, as well as a dual-circuit regulator that creates pressure in the rear brakes.
In addition, the hydraulic drive is equipped with pipelines divided into two circuits, hoses and brake mechanisms providing braking front and rear mechanisms.
Activates the hydraulic pedal located in the passenger compartment (middle). Here are the main components of the hydraulic drive:
- vacuum booster. It is designed in such a way that it creates pressure on the piston of the master cylinder, and thus causes braking;

Vacuum brake booster
- Pressure regulator drive. It is through it that the working brake fluid enters the rear brake mechanisms;

Brake pressure regulator drive
- The pressure regulator itself. Already by the name it is clear that this device is responsible for the force of pressure, its decrease or increase. He does this depending on how loaded the rear axle of the car is;

pressure regulator
- Master cylinder with pistons, equipped with a reservoir. The filler neck of the tank is equipped with an emergency TJ level sensor;

Master brake cylinder
- Brake mechanism for the front wheel. Its main parts are the disc, pads and wheel cylinders. The mechanism also has a signaling device to prevent complete wear and malfunction of the linings;

Front wheel brake
- Brake mechanism for the rear wheel. Unlike the front, disc brakes, the rear ones are drum brakes. This is the factory set. However, many car owners believe that their device does not provide high-quality braking, and change them to disc ones.

Brakes require attention. Without waiting for the control light to light up, signaling a critical level of TJ or wear of the linings, and even more so, without bringing the brakes to disappear altogether, it is necessary to carry out preventive checks.
Particular attention is paid to all connections and hoses, since the "escaped" brake fluid will not make it possible to brake, and from here it is not far from the tragedy.
Alarms
The following symptoms are quite unsafe, please note:
- If the brakes are completely gone, then definitely - you can’t go further, even to the service station! If self repair on the spot beyond your strength, or simply impossible, you need to call a tow truck;
- When braking, there is a strong vibration, especially felt in the steering column. You press the pedal, and it's just hard to keep the steering wheel in your hands. There can be several reasons for vibration:
Many argue that vibration can occur due to the fact that there are non-ventilated discs. Their device is such that they really do not like it when braking occurs in the rain, or even right in a puddle. No repair will help here - you need to replace the disks with ventilated ones;
Vibration is also possible if there is a malfunction in the rear drums. If during inspection you find dark spots on the working surface, this indicates uneven wear. In this case, the vibration is usually very strong. Such drums need urgent repair, and possibly replacement with disc brakes;
Check the front brake discs for deformation. At the same time, vibration is also observed. - The brake pedal is too hard. There may also be several reasons for this:
A clogged air filter for the vacuum booster can cause the pedal to become tight;
Check the vacuum booster itself. His possible faults- destruction of the diaphragm, tip, jamming of the check valve, damage to the hose connecting intake manifold with amplifier. In all these cases, hard pedal syndrome may be observed, and repair of any of the indicated malfunctions is needed;
Also the pedal can get tighter as the pads wear, check those too. - Hissing when pressing the brake. If it hisses exactly at the moment you press the pedal, you need to urgently check the vacuum booster, and then decide what it needs - repair or replacement. But if it hisses when you release the brake, then this phenomenon is from the category of ordinary ones. Unless, of course, hissing is not too obvious.
Refinement
Many, believing that the brakes are bad, and repairs do not help them, decide on significant alterations and tuning. For example, tuning the VAZ 2110 brake system may include replacing the rear drum mechanisms with disc ones.
In the process of using the car, sooner or later it will be necessary to replace the front brake pads of the VAZ 2110. It depends on the driver's driving style, because reckless drivers have to replace much more often brake pads front on the VAZ 2110, and this is quite natural.

You need to use those recommended by the manufacturer. If you plan to use the brake pads in the future, then you should note them when removing.
It is absolutely unacceptable to reinstall the pads from the inside to the outside and from the outside to the inside, as well as from the left wheel to the right.
Note. Brake pads from one axle must be replaced at the same time, even if only one of the pads is worn out.
Turn the steering wheel in the direction of the disassembled wheel until it stops, in order to achieve maximum convenience when replacing the brake pads.
Removing the front brake pads

How to remove brake pads:
- First you need to mark with paint the location of the front wheels relative to the hubs.
Note. Thanks to this, when assembling a balanced wheel, it will be possible to install it in its previous position.
- before starting jacking up the car, the fixing bolts on the wheels should be loosened, the rear wheels of the car should be locked with an emphasis;
- raise the front of the car and place it on a stand;
- remove the front wheels.
Note. Be aware that lifting and placing the vehicle on a stand is dangerous.
- remove the rubber rings from the brake hose;
- we take out the plug of the wear sensor from the hole, but during this it is not necessary to pull the cable;
- unhook the wire;
- we take out the brake pad wear sensor from the holders;

- unscrew the fixing bolts from above and below;
- from the guide block it is necessary to get the caliper;
- without disconnecting the brake hose, otherwise you will have to remove air from the brake system, we attach the caliper with wire or tape to the rack (see).
Note. In this case, it must be ensured that the hose is not stretched.
- with a wooden block we prevent extrusion of the piston brake cylinder;
- remove the front brake pads from the guide VAZ 2110.
Note. When using the removed brake pads, you should sign them like this: “outer” and “inner”, thanks to which it will be possible to install the pads in their original places.
Checking the brake pads

Checking order:
- it is required to clean the place where the brake pads are installed on the guide and the place of the sliding surface with a brush made of light metal wire, and also moisten a cloth in alcohol and wipe it (do not use sharp-edged tools and mineral solvent for this).
Before starting the installation of brake pads, we check the brake disc with our fingers for grooves and potholes. If there are grooves, then with a sufficient thickness of the brake disc, it can be machined.
This procedure is performed in the service station:
- we measure the thickness of the brake disc (it should not be less than 1.5 mm);
If the test showed that the pads are worn out, they need to be replaced. If necessary, the locking brackets are also replaced.
Note. It is also important to see if there are any damages to the piston mudguard, as dirt that has entered can cause the caliper to depressurize and fail.
We also look to see if brake fluid is leaking from under the piston.
If there is damage to the protective cover of the guide pins of the caliper, we repair it at the service station, or replace it with a new one.
If the brake pads are badly worn, then we also check the ease of the piston stroke. For this purpose, you need to insert a block of wood into the caliper and ask the assistant to slowly apply the brake.
For the final check, you need to insert a bar into the second brake shoe and another caliper. If everything is normal, then the piston will be easily squeezed out and pressed in.
Installing the front brake pads

The sequence of actions when performing:
- using a wooden block, press in the brake piston, being careful not to damage the protective cover and not to warp the piston.
Note. During pressing, brake fluid is squeezed out of the brake cylinder into the reservoir and it is necessary to monitor the fluid level and, if necessary, suck it out of the reservoir.
For suction, use a bottle designed exclusively for storing brake fluid. Drinking water bottles must not be used.
During the operation, you need to use a special suction device, you can not suck the liquid with your mouth, as it is poisonous. The fluid level, upon completion of the replacement of the pads, should be below the “max” mark, because when heated, the brake fluid expands and, if it gets on, leads to corrosion and destruction of its coating.
So:
- on the shoe guide, insert the shoes into the locking brackets at an angle, from the side.
Note. If old pads are installed, they must be mounted in their original place. We check that there is no oil or grease on the rubbing surface of the pads and disc.

- insert the caliper into the guide;
- new bolts must be screwed in on top and bottom of the caliper and tightened well.
Note. Right brake: insert the sensor plug into the connector, insert the wire into the holder.
- install the front wheels so that the marks made when they were removed match.
- Check the brake fluid level and top up if necessary.
After replacement

During the operation of the car, after replacing the brake pads, especially on front-wheel drive vehicles such as the VAZ 2110, you should be extremely careful. It is recommended to slow down a couple of times from a speed of 70 - 90 km / h to 8-10 km / h, lightly pressing the brake and at first do not use sharp brakes without the need.
In addition, you should check carefully:
- whether the brake hose is securely attached to the holder;
- Are the brake lines fixed?
- are the air vents fixed;
- Is the tightness normal?
Some modifications of the VAZ 2110 have brakes with a fixed caliper.
Replacing the front pads with a fixed caliper
The sequence of removal and replacement of such pads:
- mark, as in the first case, with paint the location of the front wheels relative to the hubs (due to this, during assembly, the balanced wheel can be set to its previous position);
- before starting the jacking of the car, loosen the fixing bolts on the wheels;
- raise the front of the machine and place it on a stand;
- remove the front wheels;
- then you need to knock out two pins from the caliper;
- remove the shaped spring;
- use pliers or a screwdriver to pull out the brake pads (may require a special device if the pads are rusted).
After the brake pads on the car have been replaced, it will be imperative to check the clamping spring so that it is parallel to the top edge of the pads. In addition, when installing new brake pads on a VAZ 2110 car, you need to carefully check the stupor finger.
If necessary, clean dirt from it and lubricate thoroughly. You need to install a new pad, on which the wear sensor is located, on the inside.
Help with replacing the front pads with your own hands can detailed video or photo-materials. The instruction presented above is a unique opportunity to do everything yourself.
And the price of new pads is not so high today, so it's not difficult to try to do the work yourself.
Proper brake pads are a guarantee not only for your safety, but also for the safety of other road users. Excessive wear on these components increases the risk of losing control of the vehicle and causing an accident. In order not to become a victim of your own negligence, it is necessary to systematically check the condition of the pads and change them in time. By the way, for this it is not necessary to contact a car service.
In this article, we will look at how to independently replace the front and rear brake pads VAZ-2110. But first, let's deal with the signs of their malfunction, diagnostic methods and the choice of a suitable model.
The design and principle of operation of the front wheel brakes
The front wheels of the "tens" have a disc design. Its basis is:
- brake disk;
- caliper;
- working brake cylinder with piston;
- two pads;
- fastening elements.
When we press the brake pedal, the fluid acts on the piston of the working cylinder and moves the caliper. The pads placed inside it are pressed against, forcing the hub to stop rotating.
How do you know when it's time to change your front pads?
Each part of any mechanism has its own resource, after which it must be changed. The front pads of the VAZ-2110 are no exception. Their resource, according to the car manufacturer, is 10 thousand kilometers. But this is only under the condition of their normal operation. Often they fail much earlier. They can report their failure:

Someone will probably be surprised, but the front brake pads VAZ-2110 have a wear sensor in their design. When they are erased more than the norm, on dashboard the signal lamp in the form of a wheel lights up. This is the first indication that it's time to change the pads.
If during braking you notice that the car begins to lose control and during this extraneous sounds are heard from the front wheels, this is also a reason to diagnose the brake mechanism.
How to check pads
Checking the pads is to determine the thickness of their pads. To do this, of course, you will need to dismantle the wheel and disassemble the caliper or drum. Measurements are made with a caliper or a regular ruler. The thickness of the overlays must be at least 1.5 mm. If the result of your measurements is close to this value, hurry up to replace the pads.
Which brake pads on the VAZ-2110 to choose
Only the right choice of parts of the brake system will allow you to feel confident on the road. And don't skimp here. As for the manufacturer, as usual, preference should be given to the original. Front brake pads VAZ-2110 go under catalog numbers 2110-3501080, 2110-3501080-82 or 2110-3501089. Such parts are inexpensive - about 300 rubles. You can choose pads and well-known global manufacturers of auto parts. They will cost more (up to 1000 rubles), but their quality is noticeably better.
In no case should you buy cheap analogues from Asia. Not only do they wear out twice as fast, their design is quite fragile. 
Important: pads, both front and rear, are changed only in pairs and always on both wheels of the axle! That is why branded spare parts are sold exclusively in a set of four products.
Necessary means and tools
So, if you have already purchased replacement parts, make sure that you have at hand necessary tools and funds. Among them:
- jack;
- balloon key;
- anti-rust liquid;
- medical syringe for 20 cubes;
- keys for 13 and 17;
- slotted screwdriver;
- pliers;
- hammer and chisel;
- pipe (gas) wrench.
Changing front pads
Replacing the front brake pads on the VAZ-2110 produced as follows:
- We park the car on a level surface. We fix the rear wheels.
- We turn away wheel bolts, jack up the body and dismantle the wheel. We turn the steering wheel in the direction of the disassembled wheel until it stops.
- Inspect the brake mechanism for mechanical damage.
- Determine the amount of brake fluid in the reservoir. If it is full, we select the liquid (30-50 ml) with a syringe.
- We knock down the retaining ring from the lower caliper mounting bolt. For this we use a skein and a chisel.
- Using a 13 wrench, unscrew the lower caliper bolt. We hold the guide finger with a key of 17. If necessary, use an anti-rust liquid.
- We take out the bolt and remove the caliper with the cylinder.
- Open the caliper and remove from it brake pads VAZ-2110.
- A wear sensor is installed on the rear (inner) pad. Using pliers, we bite off the wire going to it. After that, disconnect the sensor connector.
- Install new pads in the caliper. Be careful and don't get confused. Inside there is a block on which the sensor is installed.
- If the cylinder piston interferes with installation, "drown" its projections with a pipe wrench.
- After installing the pads, we connect the sensor to the wiring harness.
- We assemble in the reverse order.
- Following this algorithm, we replace the pads on the other wheel.
After completing the work, do not forget to add brake fluid to the reservoir. Also check if the lamp on the dashboard is on. 
Rear brake design
The brakes of the rear wheels of the "tens" have a drum design. It includes:
- working brake cylinder;
- two pads;
- drive unit ;
- fastening elements.
The principle of operation of the rear brake mechanism is as follows. When the pedal is pressed, it acts on the pistons of the working cylinder. They move out and spread the pads to the sides. Their pads rest against the working surface of the drum, forcing it to stop rotating.
It is driven by a cable and traction. We pull the handle, the cable acts on the traction, it spreads the pads.
What is required to replace the rear pads
First you need to purchase the pads themselves. When choosing them, follow the advice given above. Domestic auto parts manufacturers sell rear brake pads VAZ-2110 under original numbers 21080-3502090, 21080-3502090-00, 21080-3502090-55, 21080-3502090-90, 2108-3502090, 2108-3502090-80. It will not be superfluous to purchase a set of springs: tightening and guides.
From the tools you will need:

Before how to change brake pads on a VAZ-2110, do not be too lazy to release the handbrake cable. Without this, given that they do not have wear, you are unlikely to be able to install them in the drum. The cable is loosened in the inspection hole with the help of two open-end wrenches by 13.
We change the rear pads on the "ten"
The process for replacing the rear pads is as follows:

Be sure to adjust the parking brake!
As you can see replacement of brake pads on the VAZ-2110- the process is quite simple and will not take you much time. Change them on time, and your car will always be obedient to you.
The efficiency of the brakes is the most important criterion for safe driving. At the same time, the brake mechanisms have a consumable part - pads that are directly involved in the process of stopping vehicle. The braking distance of the car, as well as the comfort of deceleration, depend on their condition and degree of wear. How to determine the period for replacing the rear and front pads on VAZ cars of the “tenth” family and directly carry out the replacement work on your own?
When do you need to replace the pads and how to determine the degree of wear?
The service life of pads on VAZ-2110 cars and its derivative modifications is, on average, 15-20 thousand kilometers for the front, and 40-50 thousand for the rear. Nevertheless, their wear directly depends on a number of factors. So, in urban driving, the degree of wear is higher, as well as when operating on dusty roads, when there is a high risk of mechanical particles getting on the working surfaces.
The main symptom of a malfunction is the appearance of a characteristic whistle during braking. This is due to the fact that the design of the block provides signal strips-indicators, and when the working surface of the block is worn to a critical minimum, the strips are exposed and create this sound.
Along with this, malfunctions can be expressed in the form of a metallic rattle in the event of the destruction of the friction layer and the exposure of the metal structure of the block. At the same time, during the braking stage, vibrations and knocks may appear, as well as a characteristic creak in the area of the front wheel (or the rear wheel if the rear pads become unusable). In other words, the pads whistle, rattle or knock, giving out a malfunction.
Thickness difference between old and new pads
Necessary tools to change parts
Changing the pads on the VAZ-2110 on your own is not difficult if you have basic skills. This will require:
- keys for 13 and 17,
- regular cutters,
- car jack.
If the rear pads are changed, then the set should contain:
- head "7" with a collar,
- pliers,
- head "30" in case there are difficulties with removing the drum.
The process of replacing the front brake pads on the VAZ 2110, 2111, 2112
Replacing the front pads for cars of the "tenth" family is quite simple. For this you need:
- Jack up the car and remove the front wheel.
- Bend the locking plate, gaining access to the bolt and unscrew it by setting the keys “by 17” inside, and “by 13” from above.

Bend the lock plate

Loosen the bottom fixing screw
- Unscrew the bolt located on the caliper and remove it together with the plate.

Dismantling the bolt and plate
- Pry off the caliper and then open it.

Pry off the caliper with a screwdriver to open it.
- Remove brake pads.

Removing worn out brake pads
- Using a wrench, press the brake cylinder into the caliper body and cut off the wire responsible for indicating pad wear.

We cut the wire
- Disconnect the connector and remove the remaining wire.

Disconnecting the connector

We take out the wire
- Connect the new connector and wire.
- We assemble in the reverse order.
- After completing the work, press the brake pedal several times to restore the working efficiency of the brake system.
The process takes about 30 minutes for one wheel and can be done with minimal auto repair knowledge.
How to change the front with your own hands: video
How to replace rear
Replacing the rear pads on cars of the VAZ-2110 series and their derivatives is somewhat more difficult, since they are of the drum type. Replacement work is carried out as follows:
- The back of the car is jacked up, after which the wheel is removed.
- The guide studs located on the drum are unscrewed (in case of souring of the studs, it is possible to remove the drum together with the hub after unscrewing it).

Work is carried out with a key of 12
- If the drum does not dismantle, we tap it.

It is better to tap through a wooden spacer

Or with a mounting spatula
- Using long-nose pliers, the cotter pin located on the left side is removed.
- Using pliers, disconnect the spring that tightens the brake pads at the bottom.

We pry the spring
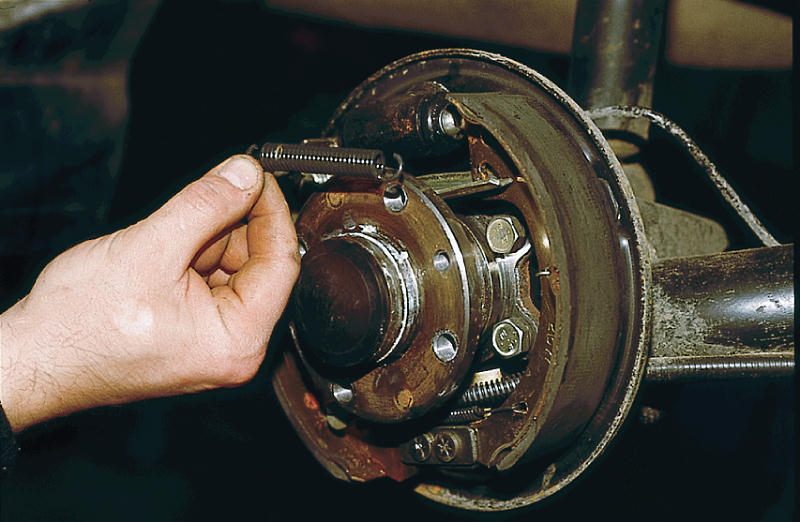
... and take it out
- The mounting side springs are removed (steps 1–4), the spacer bar (5), after which the shoes are removed from the drum body (6 and 7).
 Step 7
  Step 6
  Step 5
 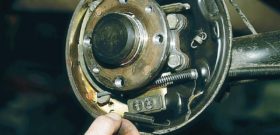 Step 4
  Step 3 Step 2
 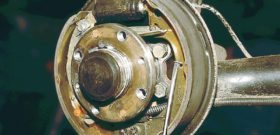 Step 1
 - The installation of the pads is carried out in the reverse order.
Video: How to remove and install rear brake pads on a dozen
Troubleshooting when replacing
There are relatively few complications when replacing brake pads. As a rule, they are associated with the souring of bolts from exposure to rust. The elements of the drum - the mounting studs - are most susceptible to corrosion. In case of possible difficulties, the drum is removed together with the rear wheel hub, and when unscrewing the studs, it is allowed to use a penetrating lubricant such as WD-40. Nevertheless, when working with brake mechanisms, lubricants should be used very carefully, preventing them from getting on the working surface of the pads or disc (in the case of the front wheels). Otherwise, the efficiency of the brakes can be significantly reduced up to a strong slip between the working surfaces of the pad and the lining of the drum or disc.
Summing up, we can note the ease of replacing brake pads on the VAZ-2110. The procedure does not require special skills and tools, it can be done in an ordinary garage without much difficulty. Knowing the sequence of operations when replacing allows you to perform this procedure quickly and efficiently.
As wear is required, the replacement of the front brake pads VAZ 2110 is required. The use of brake pads to their critical value adversely affects both traffic safety,
as well as the condition of the brake discs and caliper pistons.Often, when the pads are already at their thinnest point, the brake caliper piston reaches its extreme position and can begin to wed, causing the wheels to brake, accompanied by intense heat. This, in turn, negatively affects the hub bearings, since the grease begins to lose its properties from strong heating.
The condition of the brake pads and the timing of their replacement directly depend on the driving style. If an aggressive driving style is practiced, then the pads are replaced twice as often as during normal vehicle operation.
The cost of replacing VAZ 2110 brake pads in car repair shops starts at 500 rubles, and in this article we will tell you how you can do it yourself, saving on repairs.
Before replacing the pads, a new kit is purchased, which, in addition to the pads, also includes a brake pad wear sensor and caliper guides.
For reference. If even one of the pads is worn out, it is necessary to replace all the pads on one axle.
Replacement procedure
The vehicle must be parked on level ground if work is to be carried out on outdoors. Secure the rear wheels with wheel chocks and loosen the wheel fasteners. Next, raise one of the front wheels of the car with a jack and place an additional stop next to the jack.Loosen the wheel bolts completely and remove the wheel. If necessary, clean the brake assembly of dirt. For convenience, turn the steering wheel as far as possible towards the wheel, where the front brake pads are being replaced on the VAZ 2110.
Then release the brake hose from the mounting on the rack and remove the pad wear sensor.
Remove the caliper bracket mounting bolts, having previously straightened the edges of the fixing washers on the edges of the bolts. To do this, you can use the tip of a reliable screwdriver or a small chisel. Remove the lower bolt, lift the bracket up and fix it with improvised means to the rack.Often the cause of brake failure is soured guides along which the caliper bracket “walks”. Usually this is a torn protective cover guide, through the gap of which water and dirt from the roadway enter the guides. After cleaning and washing the guides, they must be applied with a special lubricant, for example, universal grease for MS-1600 calipers. Grease must also be applied to the caliper piston. To do this, the protective cover of the piston is carefully pry off and grease is injected using a syringe.
What is the lubricant for? The lubricant protects the rubber boot from high temperatures, the piston and cylinder itself from corrosion, and facilitates the piston stroke.
Next, you need to remove the old brake pads and press the piston into the brake cylinder to install new pads, the thickness of which is greater than that of the worn ones. In this case, you need to monitor the level of brake fluid in the reservoir of the brake master cylinder, which will rise when the caliper piston is pressed in.
Advice. If the thickness of the pads allows them to be reused, then after removal they must be marked. For example, "L" or "P" - left or right wheel and inner or outer. "L vn", "L n", "P vn" and "P n".
Then you need to disconnect the wire plug to the pad wear sensor and remove the sensor itself from the body of the inner old pad. Pass the new sensor through the o-rings, and then insert it into the new block and connect the wire plug.
New brake pads are installed (the block with the sensor is placed inside), the bracket is lowered into place, the lower bolt is placed. Then both bracket fastening bolts are finally tightened and the edge of the lock washer is bent on each bolt. The steering wheel is returned to the straight ahead position.
The wheel is put in place and the bolts are tightened, but not completely. Then the safety stand is removed, the body is lowered and the wheel bolts are finally tightened. Next, a similar replacement of the pads on the second wheel is performed.
After replacing all the pads, the level in the brake reservoir is checked and brought to normal. The cost of replacing VAZ 2110 brake pads in a car service starts from 500 rubles, and you always need to think that it is better to perform this procedure yourself or contact specialists.
After replacing the pads, it is advisable to let them run in on the disc, trying to avoid sudden braking in the region of 150-300 km.
Read also other reviews